What is digital accessibility?
Digital accessibility means removing barriers to access in the digital world. Digital accessibility helps people understand digital documents, activities and platforms who have a range of disabilities, as well as assistive technology and neuro-divergent needs.
For example, people with dyslexia often rely on clear headings, high contrast colours, and uncluttered backgrounds to help them navigate through dense content. It’s important we make our documents inclusive.
If you create your documents using Apple application, Keynote and Pages these instructions will help you. It’s important to note that Apple tools don’t have built in accessibility checkers, so checks like read order can’t be done on these applications.
How do we create digitally accessible documents?
When you create a document, consider the following questions:
- Does the document content contain proper hierarchal headings?
- Do the images in the document have alternate text?
- Is there a sufficient contrast between text colour and background colour?
- Have you added a title and set the language of your document after saving it as a PDF?
Does the document content contain proper hierarchal headings?
Headings are important to preserve the tab order and make it easier for screen readers to understand the logical sequencing of learning content in your document. Using a logical heading order allows users to sequentially experience the content so this is an easy feature to check for accessibility before finalising your document, especially prior to exporting it as a PDF.
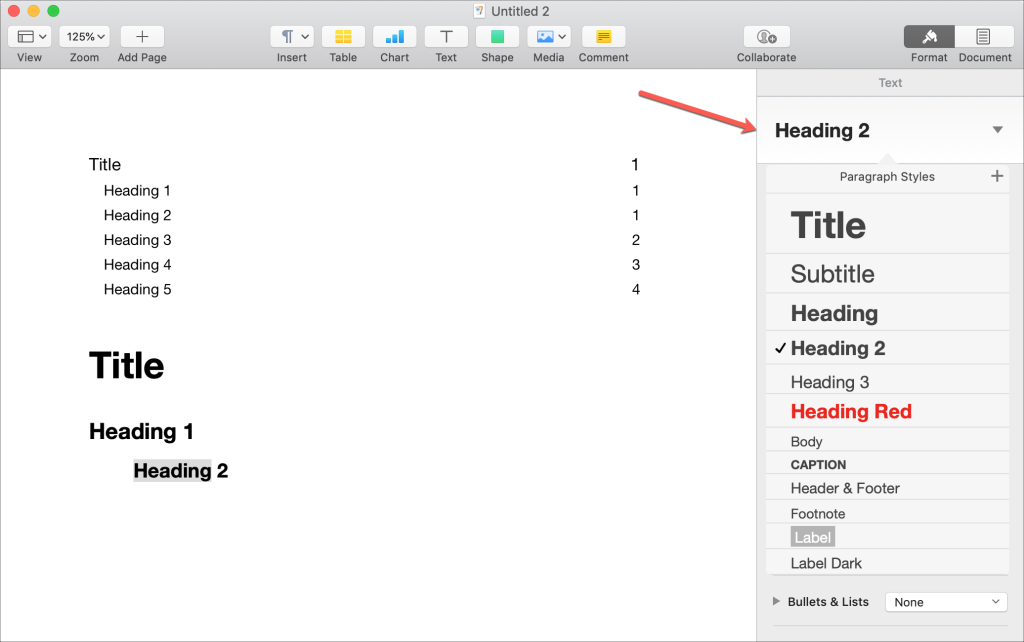
Adding a heading in Keynote and Pages
- open your document in the application
- on the top right-hand corner, you will find the ‘format’ option
- the icon may appear as a paint brush rather than have the title ‘Format’
- select this and from the drop-down menu select ‘heading’ as the type of text you wish to add
- you can diversify the types of headings you need if you require multiple by selecting ‘Heading 2’/’3’
- customise your heading according to the needs of your document and save to your Page/Keynote
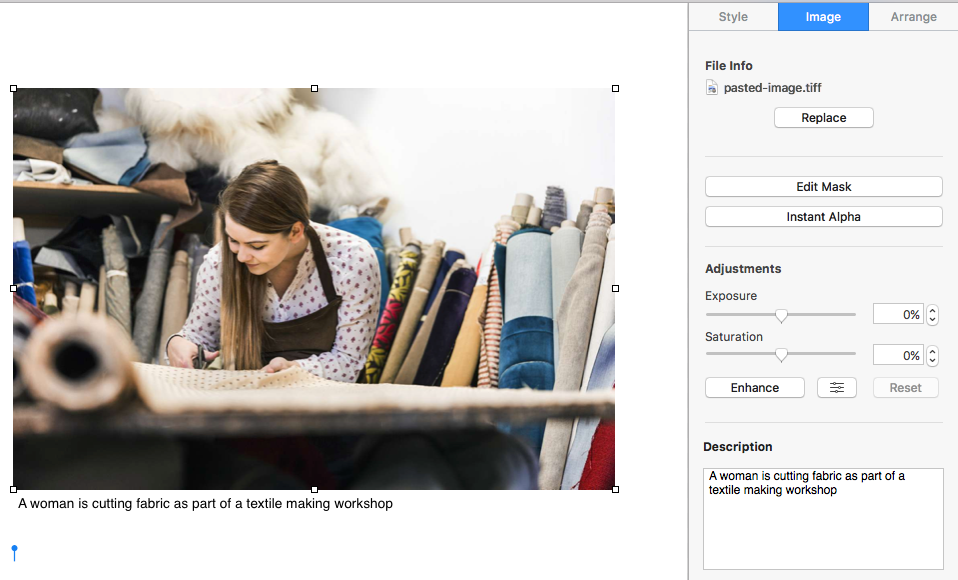
Do the images in the document have alternate text?
Users who are unable to see images depend on alternative text, often abbreviated as “alt text”, to help them understand not only what an image depicts but why it’s there. It can sometimes feel unclear how much detail to add, but a good approach is to describe just only the visual details that help explain the context of why the image was chosen. Further guidance on how to write helpful alt text.
Adding Alternative Text in Pages and Keynote
- Click the image to select it, then in the format sidebar, click the Image tab.
- Click the description text box, then enter your text. If the image is just decorative then you need to write that in the box.
Is there a sufficient contrast between text colour and background colour?
Some users may have difficulty perceiving text if there is too little contrast between foreground and background colours. Here are some tips for best practice for colour contrast of your documents,
- Choose a colour scheme that provides a high contrast ration between the text and the background.
- Avoid the following colour combinations: Green and red (or related colours); Blue and yellow (or related colours)
- Don’t rely on colour as the sole means of conveying information. For example, don’t use colour as your only method of indicating heading levels.
- Use bold instead of colour for emphasis.
Changing background colours
- Select the text you want to change the background colour for
- In the toolbar at the top of the page, select ‘Format’
- From the ‘Format’ drop-down menu, select ‘Font’
- On the right-hand side in the format sidebar, you will now see options for the coloured background and text colour for you to customize a colour contrast of your choice
- If you are using an iPad this setting may be under ‘Paragraph Borders & Background’
Have you added a title and set the language of your document after saving it as a PDF?
We can add headings, improve the colour contrast, and reduce the visual ‘noise’ of our documents, but it won’t be accessible if we don’t add a title and language set, especially if we save them as PDFs. The title and language set are important because they help Screen Readers interpret the document.
Checking for missing a title in a PDF
- From Acrobat go to File/Properties.
- In the popup, under the Description Tab, check that you have a title listed in the Title field.
- Add in the title and click ok.
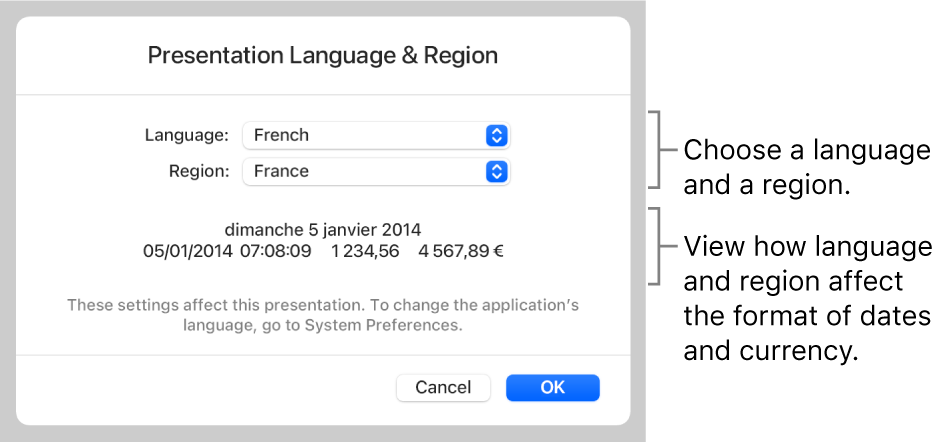
Setting your language before you convert to PDF.
- This setting option applies to both Keynote and Pages
- Open your document in Keynote/Pages
After you create a presentation, you can change its language setting while the presentation is open.You can’t change this setting for a shared presentation.
- Choose File > Advanced > Language & Region (from the File menu at the top of your screen).
- In the dialogue that appears, click the pop-up menus and choose a language and a region.
- If you choose the first item in the Language pop-up menu (System – [language]), you reset the presentation to the language and region of your computer. If you subsequently change your computer’s language setting or if you open the presentation on a different computer, the presentation’s language and region automatically change to match the computer’s. But if you share the presentation, all users see the presentation in the language and region of your computer.
- Click OK.
After you change the presentation’s language and region, any new table and chart data you enter matches the new language. Now this confirmed language setting will remain the same while you export the document to a PDF format.
You can use the accessibility checker in Adobe Acrobat Pro to fix common accessibility issues in PDF such as alternative text, heading structures and tags to make the document easier for neuro-divergent learners. To learn more about using accessibility checkers read out post on Making Accessibility a Habit: PDF
For support with making your document accessible and how to use Ally with in Moodle, contact the teaching and learning team – lccdigitallearning@lcc.arts.ac.uk
Further resources:
- Make Things Accessible – a repository for accessibility guidance materials
- AT Hive – explore assistive technology (AT) and how it can help
- My Computer My Way – for advice on making your device easier to use if you have a disability
Leave a Reply