You’ve completed your PowerPoint, you’ve run your accessibility checks, and you’re about to save and upload it to Moodle, but have you considered saving it as a video? Educational videos have been shown to increase retention and engagement, particularly instructional videos.
PowerPoint has some powerful options to add video and audio to your presentation. These are only ideas which might help support your teaching practice and might work for you.
Simply convert to video format
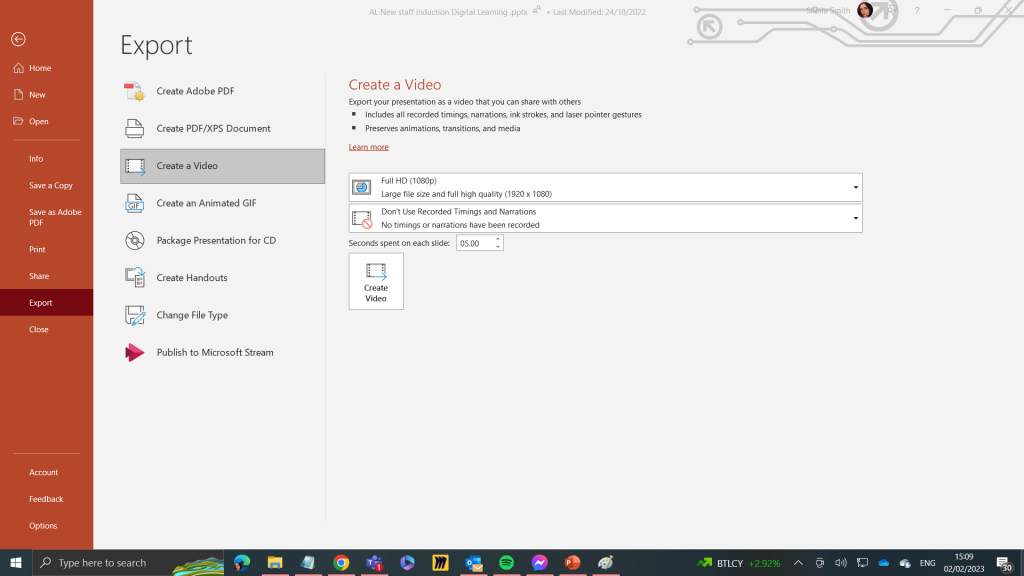
When your presentation is ready, select file and then select export. In the export options, adjust your video quality as well as the time between each slide. Students can always pause the recording, but it’s beneficial to give each slide at least 5 – 8 seconds depending on the level of detail. With this option there is no narration. It’s only the slides. Embedded content is also not suitable for this option.
Once the file has been converted, you can save it to Office 365 or your device you can then embed it in your Moodle site.
Adding Narration
You can also add narration to your slides as either audio or video. We don’t recommend repeating what’s on your slides, but there may be items that require additional context. You might also want to provide a contextual analysis of images or graphic work, or simply insert your presence into course materials to strengthen that connection with your students. This is not the same a lecture capture, where the whole lecture would be recorded.
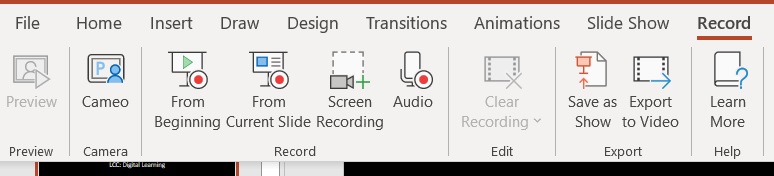
To record audio or video over your presentation, start by selecting the record tab in the menu ribbon. You will see you also have the option for exporting to video here as well.
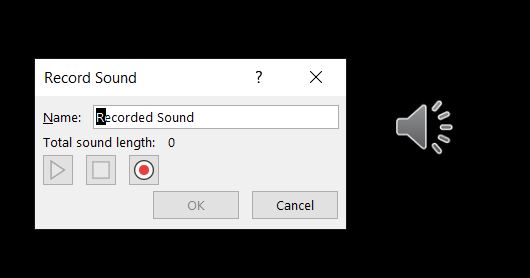
You have the option to record audio or video. Selecting the audio option will add a voice recorder and embed the recording into the current slide. You will need to record and embed add audio in each slide individually. Save the presentation as normal and the audio will then be embedded.
Recording a video
To record a video, you can either select ‘from the beginning’ or ‘from current slide’.
The video below will explain how the recording and different settings work.
Captions
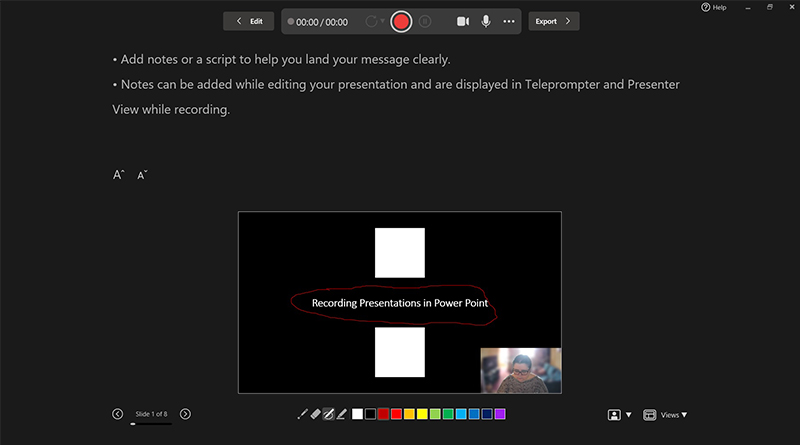
We are legally required to make captions available on all video content. PowerPoint recordings currently do not include captions by default, which is why we recommend you upload your videos to Panopto and then link them to Moodle. Alternatively, you can also use Panopto to screen record your PowerPoint presentation, but PowerPoint provides a range of tools such as laser pointer which you might find useful or you may feel more comfortable using PowerPoint’s teleprompter viewing mode.
Cameo
Cameo is another fun feature, but unlike the methods above it is used for live streaming.
Consider it like inserting a picture into your presentation. Click on the cameo icon either in the Record tab or the Insert tab. You will then see an option to insert a livestream feed of yourself into the presentation. You can resize it, move it, change the shape, or add effects and animations.
If you screenshare your presentation in Teams then your video feed will be inserted where you have placed your cameo. You can do this either on one slide or all slides.
Leave a Reply